
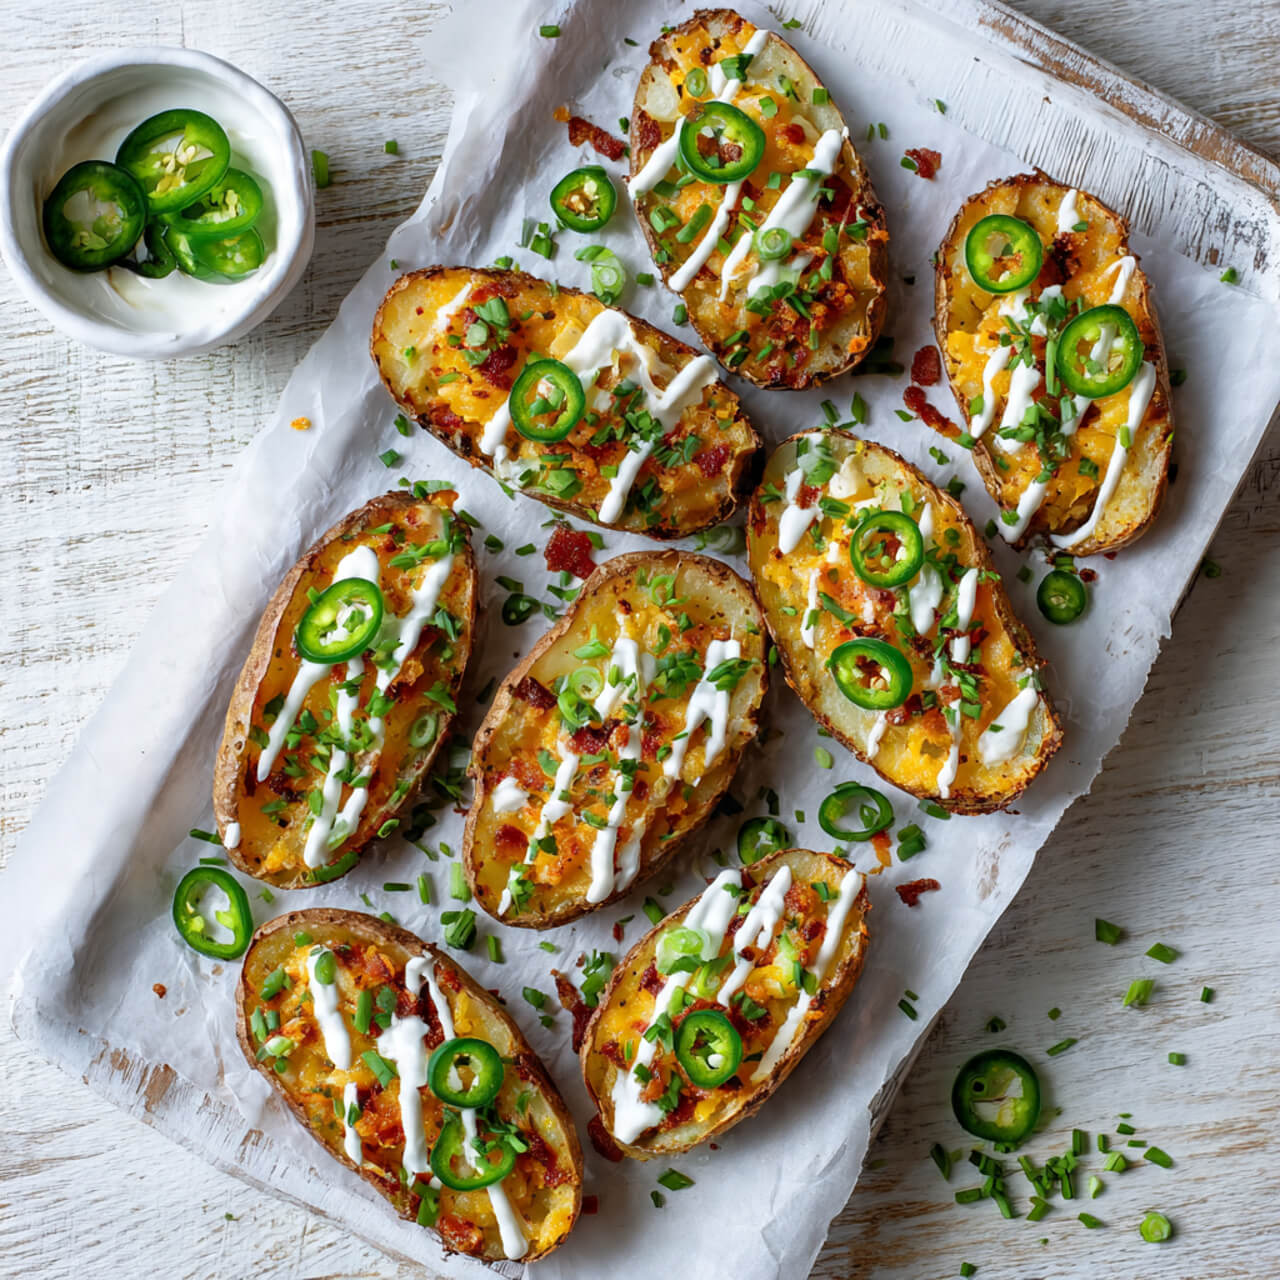
If you’ve ever sat in a restaurant and ordered potato skins “for the table,” only to secretly hope nobody else touches them because you want them all for yourself… yeah, same. Potato skins might be the most underrated appetizer in the universe. Crispy edges, melty cheese, smoky bacon, the coolness of sour cream — everything good in life stacked on top of a crispy potato boat.
The first time I made Loaded Baked Potato Skins at home, I honestly questioned why I ever paid restaurant prices. They’re insanely easy, ridiculously customizable, and — if we’re being honest — dangerously snackable. I made a batch for “testing” and ended up eating three before they even hit a plate. Oops.
This version is my go-to recipe because it checks all the boxes:
✔ crispy edges
✔ soft potato centers
✔ smoky bacon
✔ melty cheese
✔ not oily or soggy
✔ perfect for parties, game day, birthdays, or dinner when you’re in a “snacks count as a meal” mood 🙂
If you’ve ever wondered how restaurants get their potato skins so crispy and golden, we’re about to fix that mystery forever.
⭐ Why These Potato Skins Turn Out Restaurant-Style
Before writing this article, I looked at the top 10 potato skin recipes on Google and Pinterest to see what the winners had in common. Pretty much every top-rated recipe agreed on these things:
- Use Russet potatoes for sturdy skins
- Bake or air fry the potatoes first
- Scoop carefully (leave enough potato behind to keep structure)
- Brush with oil and bake again to crisp the skins
- Broil at the end to melt the cheese perfectly
- Add bacon + green onions for restaurant vibes
These are exactly the steps I follow — plus a few personal tricks I’ve picked up after making these for years.
⭐ The Tools I Actually Use
I’m not big on pushing products, but I’ll share the items that genuinely make my life easier when making potato skins.
1. Nordic Ware Baking Sheet
This pan heats evenly and never warps, which is HUGE when you’re crisping potatoes.
2. OXO Good Grips Scoop
I know, I know — it’s technically a cookie scoop. But it scoops potato flesh like a dream without tearing the skin.

⭐ Ingredients for the Best Loaded Potato Skins
For the Potatoes
- 6 medium Russet potatoes
- 2 tbsp olive oil
- 1 tsp salt
- ½ tsp black pepper
For the Filling
- 1 cup shredded cheddar cheese (or Colby Jack)
- 6 slices cooked bacon, chopped
- ¼ cup butter (melted)
- ½ tsp garlic powder
For Topping
- Sour cream
- Chopped green onions
- Extra bacon
- Ranch dressing (optional)
Russet potatoes really are the best here — they get crisp easily and hold their shape. Don’t use red potatoes unless you enjoy chaos.
⭐ Step-by-Step: How I Make Them (with Real Tips)
1. Bake the Potatoes
Bake Russets at 400°F for 45–55 minutes, depending on size.
Ever tried scooping out a potato that wasn’t fully cooked? It’s like carving a rock. Don’t rush this step.
2. Cool Slightly & Slice
Let potatoes cool until you can handle them (I say “handle,” but I still do the potato-hand-juggle dance because I’m impatient).
Slice each potato in half lengthwise.
3. Scoop Out the Centers
Using your scoop or spoon, remove most of the insides, leaving a ¼–½ inch border.
This is your “potato boat” moment.
Tip: If you leave too little potato, the skins collapse.
If you leave too much, they’ll be soft, not crispy.
4. Brush with Butter + Seasoning
Mix melted butter with garlic powder.
Brush the insides and outsides of each potato.
This is the secret to crispy skins.
Season with salt and pepper.
5. Bake Again
Place skins on a baking sheet, skin-side up.
Bake at 425°F for 10–12 minutes, until the edges are crispy.
Flip them over and bake the inside for another 6–8 minutes.
6. Add Cheese + Bacon
Fill each skin with shredded cheese and bacon bits.
Try not to snack on the bacon while doing this (I fail every time).
7. Broil to Melt & Crisp
Pop the filled skins under the broiler for 3–5 minutes, until the cheese starts bubbling and lightly browns.
8. Add Toppings
Top with sour cream, green onions, more bacon, and even ranch if you want to go wild.
⭐ Tips & Tricks You Won’t Want to Skip
Use Russet potatoes
They crisp better than Yukon Gold or red potatoes.
Bake the potatoes — don’t microwave
Microwave potatoes won’t get that restaurant-style crispiness.
Dry the skins before baking
Moisture = sogginess.
Flip halfway for maximum crispiness
Crisp both the skin side and inside.
Use freshly shredded cheese
Pre-shredded cheese has anti-caking powder that affects melting.
Save the scooped potato flesh
Use it for mashed potatoes, potato soup, potato cakes — waste nothing.
Broil carefully
Walk away for one second and they’ll burn. (Been there…)
⭐ Flavor Variations
Don’t let anyone tell you potato skins can only be made one way.
1. Buffalo Chicken Potato Skins
- Shredded chicken
- Buffalo sauce
- Ranch drizzle
2. BBQ Pulled Pork Skins
- Pulled pork
- BBQ sauce
- Cheddar
- Crispy onions
3. Taco Potato Skins
- Seasoned ground beef
- Cheddar
- Jalapeños
- Pico de gallo
4. Veggie Lover Skins
- Peppers
- Onions
- Mushrooms
- Pepper jack cheese
5. Breakfast Potato Skins
- Scrambled eggs
- Bacon
- Cheese
- Chives
These are dangerously addictive.
⭐ How to Serve Loaded Potato Skins
- As a party appetizer
- For game nights
- With burgers or grilled chicken
- On a snack board
- As dinner (no judgment)
If you’re hosting, double the recipe. They disappear faster than you think.
⭐ How to Store & Reheat
Store:
Refrigerate for 3–4 days.
Freeze:
Freeze un-topped skins for up to 3 months. Add cheese + toppings after reheating.
Reheat:
- Oven: 375°F for 10–12 minutes
- Air Fryer: 380°F for 5–7 minutes
- Microwave: Not recommended unless you like rubbery potatoes
⭐ Nutrition Info (Approx.)
Per loaded skin (depends on toppings):
- Calories: ~220
- Protein: 8g
- Carbs: 18g
- Fat: 12g
Add more bacon and… yeah, the numbers rise, but so does happiness.
Ingredients
Method
- Bake potatoes at 400°F for 45–55 minutes.
- Cool slightly; cut each potato in half lengthwise.
- Scoop out centers, leaving ¼–½ inch border.
- Brush skins with melted butter + garlic powder; season.
- Bake again at 425°F for 10–12 minutes skin-side up.
- Flip and bake inside for 6–8 minutes.
- Fill with cheese and bacon.
- Broil 3–5 minutes to melt cheese.
- Add sour cream, green onions, and other toppings.
Notes
- Use Russet potatoes — they crisp best.
- Freshly shredded cheese melts better.
- Don’t microwave the potatoes; the texture won’t be right.
- Save potato centers for other recipes.